Tooltester is supported by readers like yourself. We may earn an affiliate commission when you purchase through our links, which enables us to offer our research for free.
In this article and video course, we’ll show you the most practical and affordable way to build and maintain your own business website without any programming.
So you’re launching your own business — how exciting! You don’t need us to tell you that if you want to grow your business, a website is a must. If you’re stuck on how to do this, don’t worry. It doesn’t have to be complicated.
Who’s this article for?
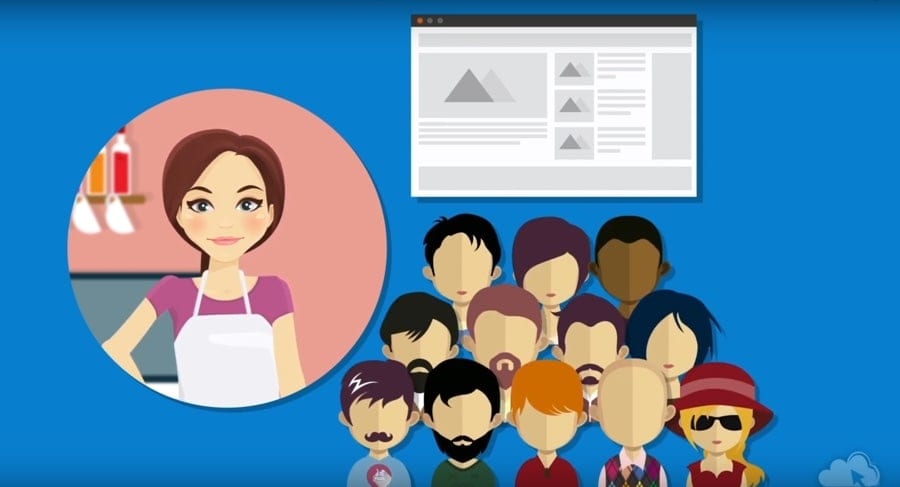
If you’re a small business owner or entrepreneur with no experience in web design, but want to make a professional website, you’ve come to the right place!
We’ll walk you through it using Sarah as an example. Sarah runs a local bakery. Customers have been coming to her bakery by word of mouth, but she wants to reach more people. While we also have a tutorial on how to create a regular website, this guide is much more focussed on small business.
Free Video Course: “How to Create a Website for your Business”
The easiest way to learn all the steps to creating a website is to follow our video course. In about an hour’s time (59:33 minutes) we will teach everything you need to know. Lean back and enjoy:

If you feel like giving it a try yourself: Start a free Wix website here.
Five Stages of Making a Business Website
Building a business website isn’t complicated if we break it down into five main steps:
- Plan your website
- Choosing your tools
- Building your website
- Adding an eCommerce Store
- Publishing your site and next steps
There you have it. Now let’s go over the steps in detail using Sarah’s Bakery as an example? Ready?
Plan your website
Don’t skip this step. You wouldn’t build a house without securing the foundation first, right?
In the planning stage, you would determine the purpose of your site and figure out what functionality, features, and content it should have. Trust us, having a well-thought-out plan will save you a lot of headaches. Here’s how to go about this:
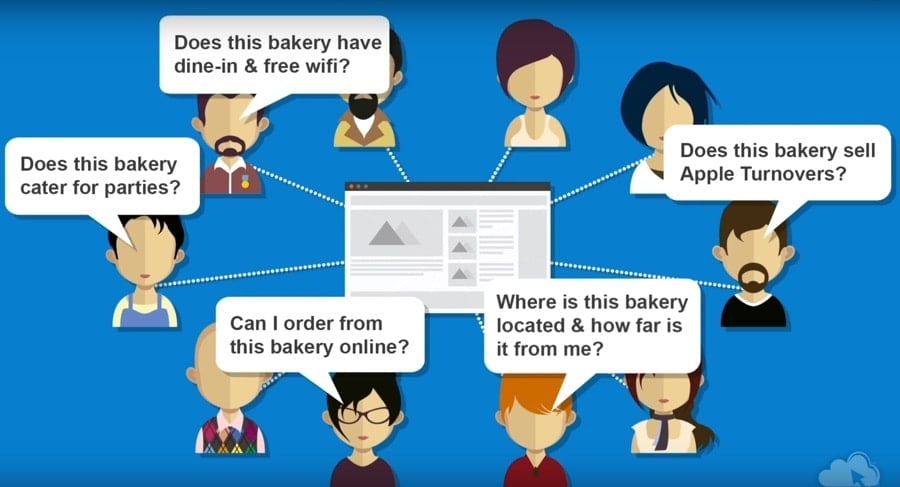
1. Determine the purpose & functionality of your website
Before you do anything else, nail this down. Decide on your website’s purpose, then figure out what it needs to have to accomplish that purpose. Make sure the purpose of your site is specific and benefits your customer. Make your goal specific and beneficial to your target customer. Don’t think only of your business goals. Do think of what would make your customer want to visit your website.
If you’re like Sarah, your first thought be that your website’s purpose is to give you more customers. Well, that’s not specific enough.
Try another approach: how does this goal help you figure out how to benefit your customers?
Let’s try again with Sarah. Sarah changed her website’s purpose to:
- inform people about her bakery
- help them decide if her bakery is the right choice for them.
Bingo, now the purpose is specific and customer-centered. Once you’ve laid out your website’s purpose, you’re ready to move on to the next step of the planning stage.
2. Create a site outline (using pen and paper)
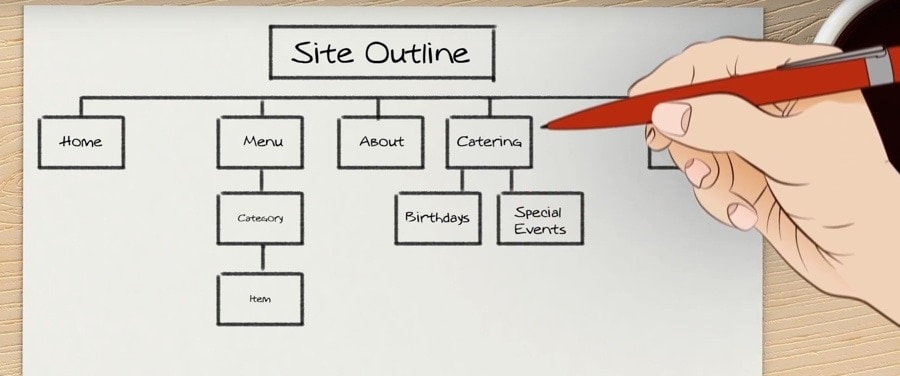
Turn off your computer and grab your pen and paper — in fact, grab multiple sheets. Think of all the pages that your website would need to accomplish the purpose from step one. What should each page need have? Don’t worry about writing the content for each page yet. At this stage, you’re trying to figure out what pages to have in the first place.
Feel free to make lots of mistakes here. The more freely you brainstorm, the more brilliant ideas you’ll come up with.
Stuck? Here are the pages you’ll need for sure:
- Home page: If staring at a blank piece of paper terrifies you, go ahead and put down your home page. Your home page is your introductory or “landing page.” This is like the front door to your business, so it’s what people will see first when they visit your website (no pressure, right?) What do you want them to know? If you were a new customer, what would you like to know?
- Other pages: After you’ve planned your home page, good job! The most important page is now behind you. Next, sketch out other pages that your customers will find useful. Some examples might be an About page, a Contact form, an image gallery, reviews, or later even an eCommerce store.
3. Analyze your competitors
There are probably other businesses out there who are trying to do the same thing you are, so it helps to see what the competition is doing. Take note of what they’re doing well and what they need to improve. Learn from their mistakes.
This might give you more ideas for pages, so edit your site outline as you go along. Make sure your pages are organized in an efficient and intuitive way.
4. Brainstorm content for each page
Now that you’ve nailed down your purpose and site outline, it’s time to write the content for each page. You’ll need even more paper here, so grab a few more sheets.
Again, this stage doesn’t have to be perfect. Just write a rough draft of the content you’ll need for each page. Take note of what images, videos, or audio you’ll need if any.
If writing is not your thing you can also hire someone to do it for you. Try contacting your local creative staffing agency (like Creative Circle) or find a freelancer on Upwork.com. Cheaper (fixed-price) options can be found on Fiverr.com but this platform can be a bit hit and miss.
5. Choose a domain name
So you’ve got your site purpose, your outline, and your rough draft. Nice work! Having these planned out will help you come up with a domain name. The domain name is the website’s address (for example www.yourbusinessname.com)
Need help coming up with one? Here are some tips:
- Have a small set of keywords or phrases that best describe your business and make them unique. Use them as a starting point.
- If the domain name you had in mind is taken, avoid adding numbers to your domain. Just try other keywords to make your domain unique.
It doesn’t matter too much where you buy your domain name. A .com domain name will be around $15 per year if you buy it at a place like Namecheap or Google Domains. You can then connect it to your website, which can be hosted in a different hosting company. But you can also purchase it together with your website package at Wix, for example, at a similar price.
Choose your tools
You’ve got your plan and your domain name. Now you’re ready to pick your tools.
Choose a platform
Don’t have a lot of time? Can’t code? There are tons of options here depending on how much time you want to dedicate to building your website.
A common question is should I use WordPress or a website builder? WordPress is a popular choice for professional websites. It comes with a lot of great features, but it’s still a complicated platform to learn for someone who’s never built a website before.
You can end up breaking things, and hiring a developer to fix any errors can end up costing you. Unless you have a lot of time and experience, we would recommend a website builder, particularly Wix.com, an easy-to-use and popular platform. Find a detailed Wix review here.
Choose a template
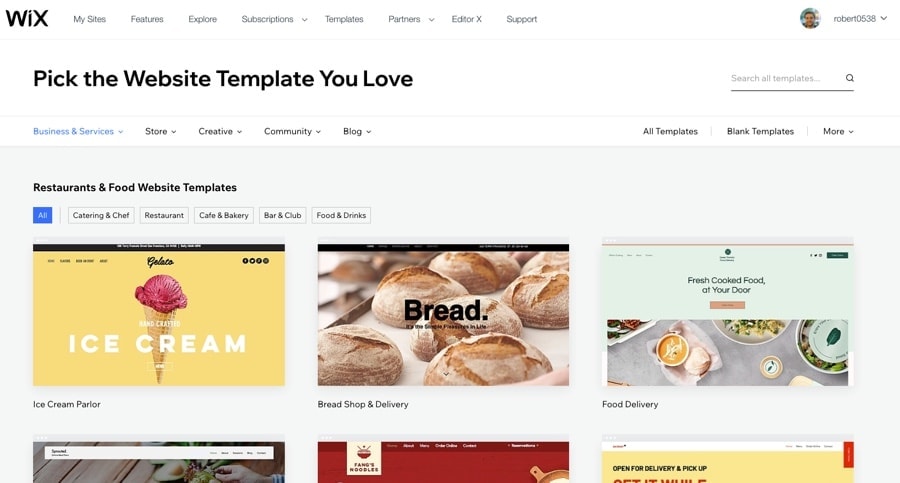
One of the great things about website builders is that you don’t need design skills. Wix in particular has loads of designer templates you can choose from. There are even categories for different business types. Pretty cool, huh?
Of course, no template is going to be a perfect match, but the good news is, you can customize them very easily with your own colors, fonts, and images. Some website builders limit your ability to customize a template, so it’s best to choose one that’s pretty close to the design you want.
- Got to the Restaurants and Food templates, hover over a layout and click it to get a better look.
- Once you’ve found a template you like, click Edit. Don’t worry about customizing your template now. We’ll go over that later.
- Choose a name and a temporary URL for your website. Don’t worry about making this sounding professional just yet.
- Click Save.
- Enter a descriptive name for your website if you’re saving it for the first time.
Choose a paid plan
When you’re ready to publish your site, remember that you’ll want to use your own professional domain name from the planning stage. The temporary URL that comes with the free plan is totally unprofessional and hard to remember.
Most website builders require a premium plan to do this and you will need to upgrade. You can do this now or at a later stage.
> Click here to view Wix’s Premium Plans
Because you’ve already planned out your site’s purpose and functionality, it’s easier to choose a plan. Select the plan that you need, and complete the checkout process.
Build your website (best practices)
Roll up your sleeves. This is when we actually take your brilliant plan from the first stage and turn it into a website.
Log back into Wix or your website builder to see the new business website you’re working on. Click Edit to start. This might look different if you’re using another builder, but the idea’s the same.
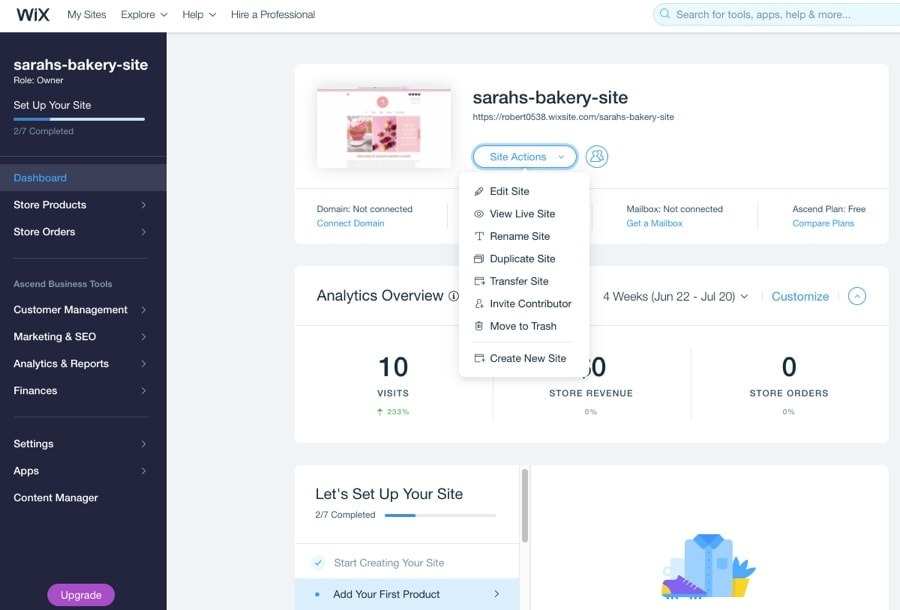
Since some of you might be using different website builders, we’re not going over the nuts and bolts of how to use these builders. Instead, please look at your website builder documentation (here’s a detailed Wix tutorial) first, then come back to this article to continue on with best practices.
Here’s also a useful (12-minute)-video tutorial that helps you build a website with Wix:

Sign up for a free Wix website here.
Let’s now continue with a few more general web design tips.
Page structure
Every good business Web page has these common elements even if they have different content:
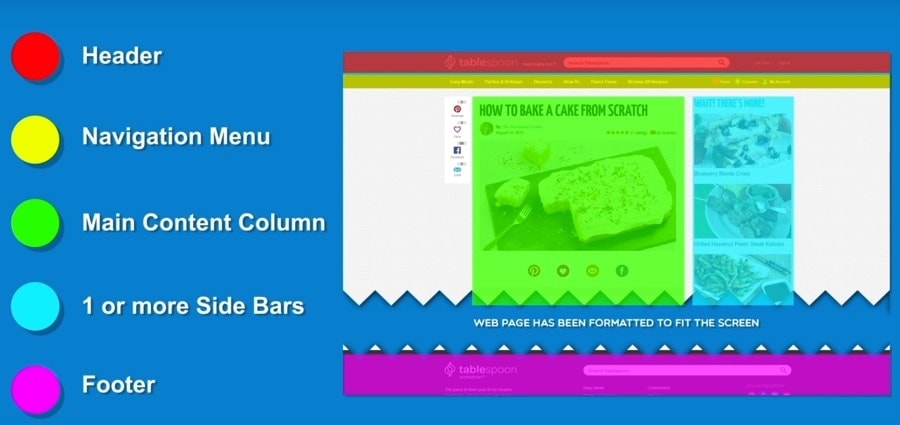
- Header
- Navigation menu
- Main content column
- One or more sidebars
- Footer
Having these elements will make it easier for your customer to navigate between pages.
Content structure
Now that you’ve added your elements to a page, you’ll also need to structure your content. Sections and headings make your content easy to read for both users and search engines. I’m sure you’ve seen bad websites that are just a big blob of text. Avoid that downfall by organizing your content into sections with headings. It’s really important to use various headings such as H1 for top headings, H2, H3, and so on for lower levels.
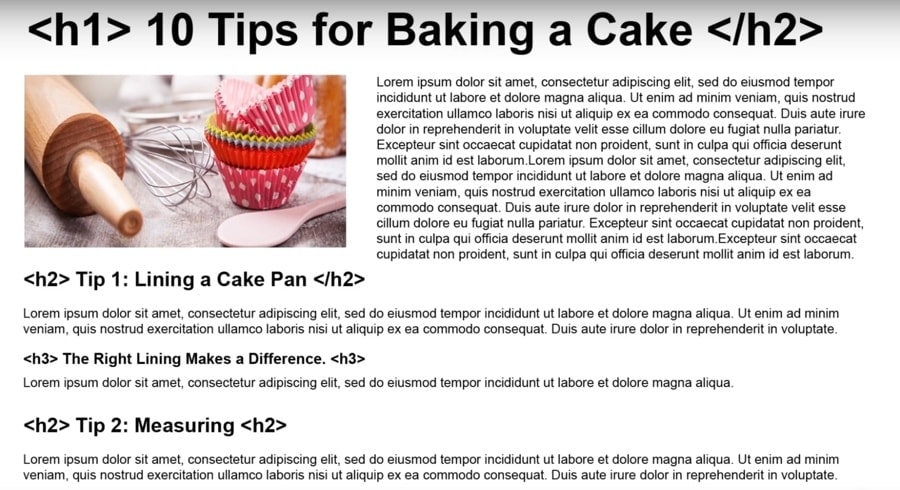
Tip: Use actual heading tags to create headings. An easy beginner mistake is to take normal text and making it look like a heading by making it bigger and bolder. Search engines will not recognize this as a heading. (Hint: this can hurt your search engine rankings!)
Visual design
Now that you’ve learned the bones of your pages and content, let’s talk design — the physical appearance of your website. Website builders already offer predesigned templates that are ready to go. You can just choose a template and swap out text and images, then you’re basically done.
But don’t let this stop you from fully customizing the template or even designing one from scratch if you have the time and creativity. Even if you see a template you like, you’ll still have to make some changes to get the design to match your brand.
Colors
The right color is important not just for your website design, but for your business, branding, and product marketing as well.
What if…
I don’t have a color scheme? Take the time to figure out a good color scheme. Different colors have different meanings associated with them, so it’s worth learning a bit of color psychology. Look around and you’ll see colors used in marketing strategy. Fast food restaurants are usually red and orange. Banks and financial institutions are often blue, while luxury products are typically packaged in black. Check out color wheels and see what colors go well together.
I do have a color scheme? Great! Use these colors in your design. On the Web, colors are determined by using a hexadecimal value. For example, the color red is defined as #FF000 in hexadecimal. Understand and use your website’s colors in their hexadecimal value so you can reference the exact colors in the future. This will save you a lot of headaches.
Once you have your exact colors down, start swapping them into your template. Some builders like Wix let you add and save colors so you can use them later.
Typography
Another thing you need to change on your template is typography or font face. The typography you choose will affect your site’s readability, mood, and perceived article length so don’t go too over-the-top with your fonts.
- Choose a font face
Spend time looking at your builder’s different fonts. It’s best to use only two or three different font types across your whole site, and make sure they go well together.
- Choose a font size
This is measured in pixels. Make sure it’s not so small or big that your customers
can’t read your text. For most body text, a good size to go with is 16 pixels, while
headings are bigger (H1 might be 36 pixels, H2 is 30, H3 is 24, and so on). It really depends on the font face you use so use your best judgment here.
Images
It’s easy to swap out images in website builders. Some builders have stock images that are very tempting to use, but it’s better if you use photos of your own business.
For example, Sarah shouldn’t use stock images of a bakery shop. She should use real images of her own bakery shop. And she’d most definitely want to use real images of the goodies she bakes every day, not just a stock image of a generic product.
Stock images aren’t always a bad choice. Builders like Wix offer lots of free and paid stock images that are professionally shot. But you should be careful that the stock image doesn’t look fake or misrepresent your business.
A better option is to hire a professional photographer so you can get real images of your business.
Don’t just add your images without editing them. A good website will use images edited with advanced imaging techniques, not just images that are plugged in without any thought. If you’re unable to edit these images on Photoshop use the basic cropping and editing tools in your website builder.
Designing for mobile
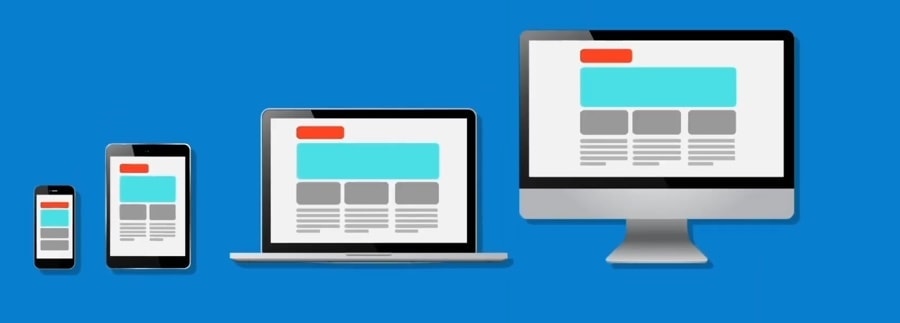
Once you’ve modified your template with your colors, images, and typography, your website is well on its way. But before we celebrate, there’s one more aspect to keep in mind, which is designing for mobile.
Why is this important? Many users will be looking at your site on their phones or tablets. These devices have way smaller screens than a desktop computer, so your website will have to respond and adapt to these smaller screens. This is called responsive or mobile-friendly design.
Many website builders have responsive or adaptive templates that work on both desktop and mobile. Try to pick responsive templates when you can.
In Sarah’s case, the Wix lets her switch between desktop and mobile. In mobile view, make adjustments and hide less important elements to make your site look good on mobile screens.
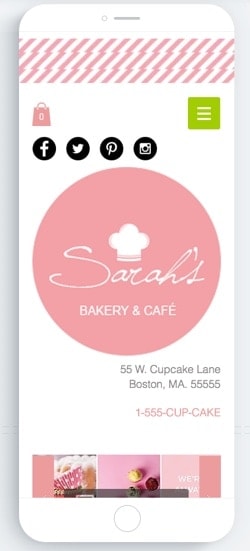
Make sure to check your design on both desktop and mobile. We recommend designing your website in desktop view first, then switch to mobile view and make your adjustments there.
Optimizing for SEO
You’ve probably heard how SEO is important to your site but you may wonder what it is. SEO, or search engine optimization, affects how visible your site is in unpaid search results. It’s how your website gets found. We have a full study of the best website builders for SEO here.
There’s a lot of work on performing SEO on a website, but we’ll give you a crash course on onsite SEO, which involves optimizing content on your website. Most onsite SEO work can be done in Wix. There’s even an SEO tool (SEO Wiz) that guides you through optimizing your website.
In Sarah’s case, she wants new customers to find her bakery website when they search for local bakeries in Google or Bing. She’ll have to perform some SEO onsite work so search engines can recognize her page and better understand what her page is about.
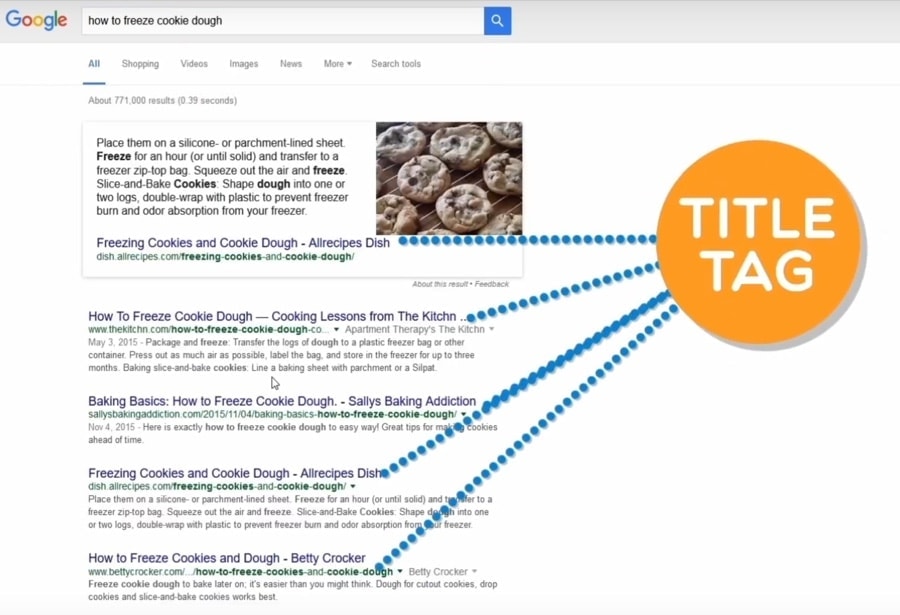
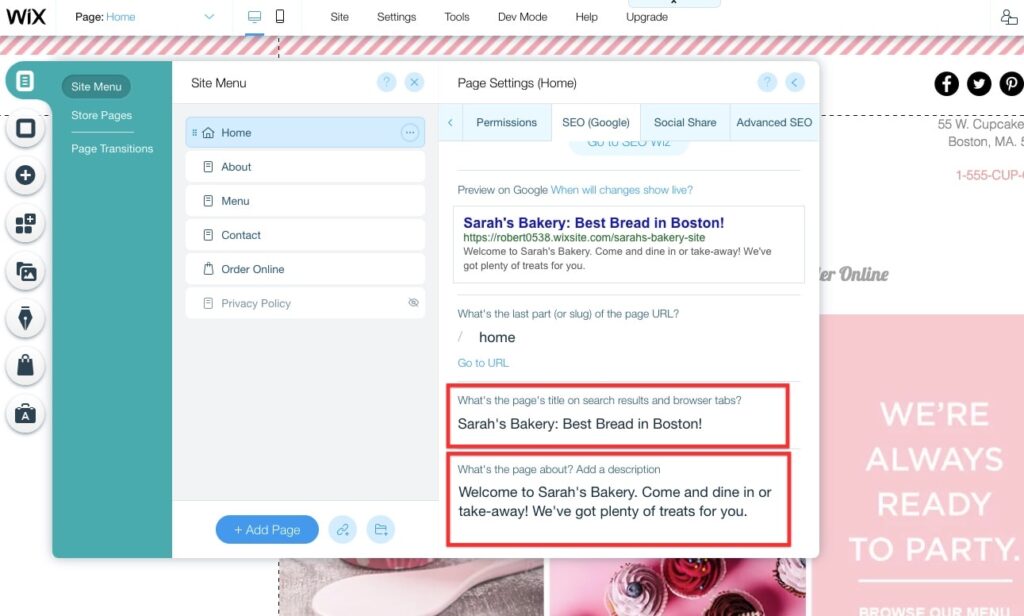
1. Add a title tag to each page.
A title tag describes your page in less than 60 characters so search engines and people know what it’s about. It also appears when you bookmark a page, share it on social media, or view it on the search engine results page:
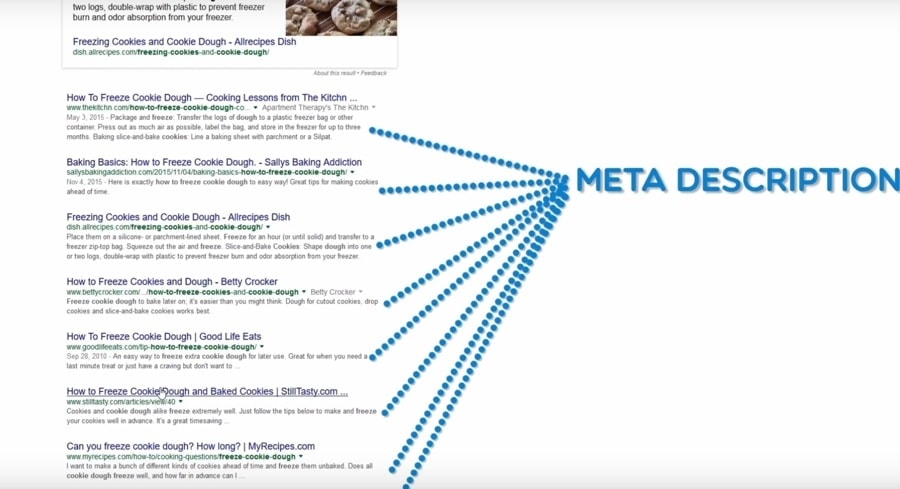
2. Add meta description and keywords
Don’t forget this one either. Just like the title tag, the meta description is invisible
on the page itself, but it does make its appearance in search engine results lists.
Keep these descriptions short (about 160 characters) and descriptive so
customers can quickly figure out what your site is about.
3. Page URLs
Use URLs to name or label your pages using short, descriptive keywords. This will give search engines more hints about what your page is about. Usually, the URL matches your title tag.
Make sure your URLs aren’t too long so they don’t get cut off by search engines.
Make sure to separate the words using hyphens to make your URLs readable to humans.
4. Use appropriate keywords in your headings
Using keywords in your headings helps search engines understand what your
page is about. Use important keywords in your headings but make sure the
headings still sound natural. You wouldn’t want to drive customers away with robotic-sounding headings. That would defeat the purpose of SEO.
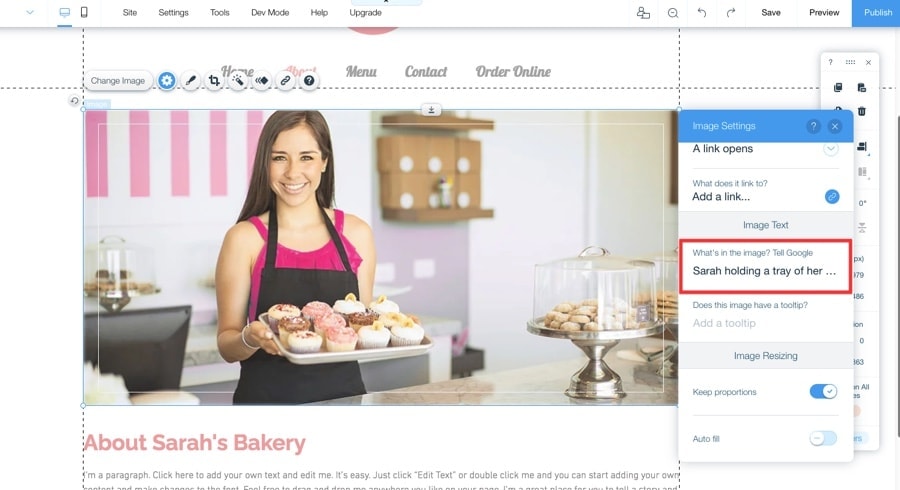
5. ALT text for images
Search engines can’t tell what your images are about, so they need a little help from humans. Additionally, if a page is having trouble loading images or if a customer is visually-impaired and using a screen reader, the ALT text will describe the images to them.
Wix makes it really easy to add ALT text to images. Just click on the image and then click the settings button. You’ll see an option to add text to your image when you scroll down.
Hiding Web pages
There are some pages that you don’t want to appear in search engine results. This might be boiler-plate copy (like privacy policies) that’s also on lots of other websites. In the world of SEO, copied content is called duplicate content and search engines don’t like that.
So if you need to use duplicate content or have content that you don’t want in search results for other reasons, hide that page by telling search engines not to index it. In website builders, this is called either “hiding” or “no indexing.”
No, not really. Some websites use templates that already have content. We know how tempting it is to just use that content on your site, but there could be thousands of other websites that use that same content. Replace all pre-existing content whenever possible. You’ll thank yourself later.
Any website builder should let you perform onsite SEO. In Wix, you can do this by going to Pages, clicking the More button, then clicking Page SEO.
Add an eCommerce store
If you do decide to sell products online, adding an eCommerce store is pretty easy with most website builders, especially with Wix.
To learn more about the features of the Wix Online Store, check out this video review:

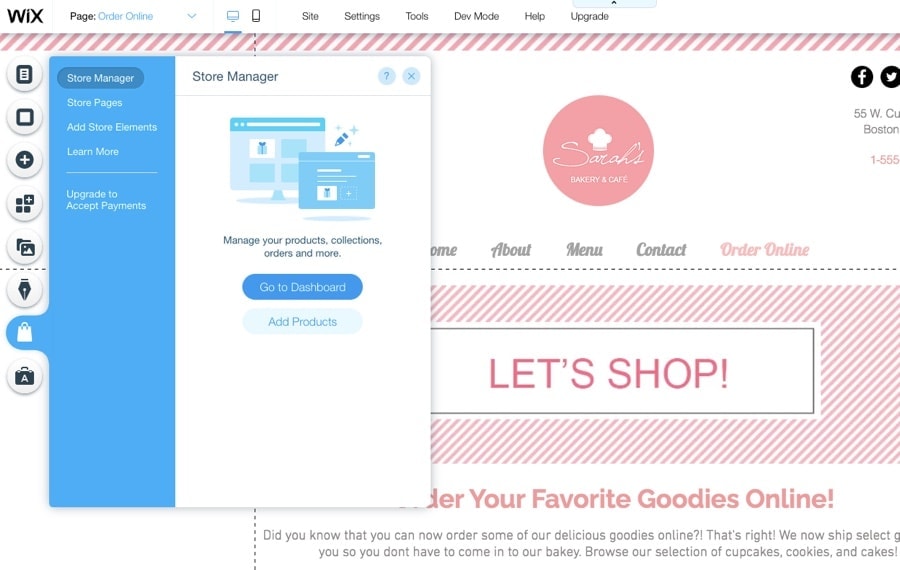
In Wix, adding a store is easy:
- Make sure you’ve signed up for an eCommerce plan.
- Go to Add.
- Click Store.
- Add products, coupons, shipping options, and so on.
Let’s go over the best practices of building your eCommerce site.
Let’s take a look at the bare bones you’ll need for an eCommerce page. Website builders will auto-populate your site with dummy products so you’ll need to replace that content with your real products.
-Make sure your product titles and descriptions have your targeted keywords. People often won’t find your product pages just by browsing your website. You’ll want them to find you on search engine results too.
-Don’t copy titles and descriptions from the product manufacturer (or anywhere). You’ll end up creating duplicate content and that’s bad for SEO.
Product page
This is where people read about your product and decide whether or not to buy it. You’ll need a good product page. Your customers can’t touch or feel the product, so your content is your chance to convince them. But what makes a good product page, you ask?
- Make your product page well-written (check it for errors!), accurate and descriptive, and go for 1000 words or more if needed. Avoid vague, confusing descriptions. Make your customers feel confident about spending their money on your product.
- Use high-quality images and ideally video too. You might want to invest in a good camera or smartphone and a professional photography box if you can’t hire a professional photographer.
- Use ALT text on your images. These help search engines and screen readers read what images are about.
- Add social media share buttons. The reason’s pretty obvious. You want your customers to share your product pages with as many people as they can.
- Add customer reviews. Not all website builders support this, but if yours does, definitely consider adding it. This will help customers understand if a product is right for them, not just based on your words, but also of other customers.
Here are a few additional tips for what to put on a product detail page.
Categories
So you’ve got a good product page in place (woohoo!) Let’s go back to the store page and categorize your products. All eCommerce platforms will let you organize your products into categories.
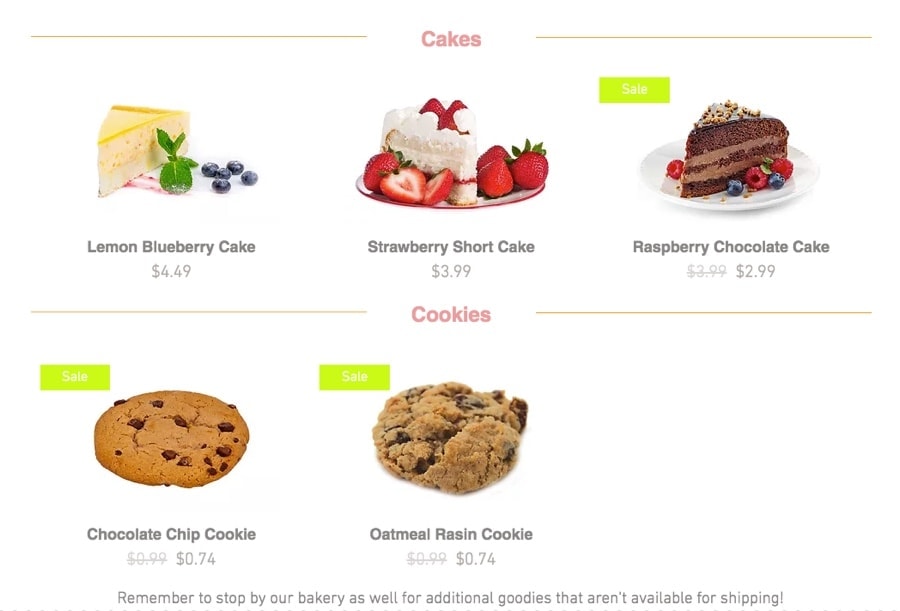
In Sarah’s case, she grouped similar products, like cakes or cupcakes, together.
Why is this important? It helps your customer navigate your store more easily. Categories also help them discover similar products to the ones they’re looking at. Imagine how frustrating it would be to look through a massive list of products without any organization.
As always, use descriptive keywords in your category names. It might be tempting to use cute category names here, like “All things pink”, but if search engines don’t get what your category page is about, your page will sink to the bottom of search results.
Policy page
Last but not least, the policy page is there to protect both you and your customers. It has your return policy, terms and conditions, and privacy policy, which is required by law in the U.S. Although there are policies out there that you can copy and paste, it’s a good idea to consult your business lawyer and create your own policies. Any eCommerce platform will have an option to add a policy page.
In Wix:
- Go to My Store.
- Go to Manage your store settings.
- Scroll down until you see the policies.
- Copy and paste the policies you need in the right spots.
You can preview your changes by clicking the Preview checkout page.
Where to add your policy pages:
- Add links to your policies in your footer.
- Add them to the bottom of your checkout page.
Some website builders, like Wix, will automatically add your policies to your checkout page.
Publish Website
Are you ready to show the world your website? You’re in the right place then. All the work you’ve done so far has been behind the scenes. Nobody will see it until you publish it.
- Make sure you’ve given your website its professional domain name, not the temporary link.
- Log into your website builder.
- Click Publish.
That’s it! Your website is now live and waiting for customers to find it. Click through your live website on both desktop and mobile to make sure everything looks good.
Congratulations! You now have a business website. Keep on reading to see what next steps you can take.
Next steps
Now that you have a live business website, it will need some care and maintenance in order to help your business grow. Here’s where the real work comes in.
Manage and maintain your business website
If your business is growing (and we hope it is!) you’ll have to continually update your website by adding, updating, and removing content so your information is always accurate.
You’ll also want to keep testing and tweaking it based on your conversion rates. If something’s not working well, fix it. In Sarah’s case, if people aren’t buying her products, she’d take a look at her analytics to see where her product pages are failing.
Use a professional email address
Now that you have a business domain, it makes sense to get a professional email address. In fact, it’s a great idea to create a different email address for different purposes. Most website builders recommend Google Workspace these days, which is around $6/month per email address.
Analytics
Google Analytics is a free service from Google that lets you measure sales, visits, and other behavior. It can help you answer questions about what is and isn’t working on your website.
Add Google Analytics to your website now even if you don’t plan to use the data soon. You’ll want to start recording that data now so you can compare it with your data in the future.
Marketing, blogs, and social media
Your website will exist in a virtual void until you actually start marketing it. Don’t worry, you won’t need to put up billboards or run cheesy TV and newspaper ads to do this.
Here are a few ways to do it.
- Blogs: A blog’s a good idea if you want customers to get updated on new products or services or any promotions and changes to your business. You can also share your expertise here, which will attract more readers who can turn into potential customers. We won’t go over how to create a blog here, but Wix has some great documentation to get you started.
- Social media: Virtually every business now has social media which is a good way to advertise and communicate with customers. You don’t need to present on every social media network, but do sign up for ones that make sense for your business.
- Online reviews and positive ratings: Start collecting reviews and ratings from the Better Business Bureau, Yelp, and other review websites. Around 80% of customers read reviews before they make a decision on an online business.
- Paid marketing: If you’re ready to move beyond free marketing strategies like social media and SEO, you can experiment with paid strategies. Even if you have a small budget, paid marketing can quickly drive new visitors to your site without having to wait for onsite SEO to do its thing. You can do this by running ads in social media, on other websites, and on search results pages (via Google Adwords). Be careful with this step and make sure to set up budget limits on your advertising platform so you don’t get any costly surprises.
Claim a Google Business Account
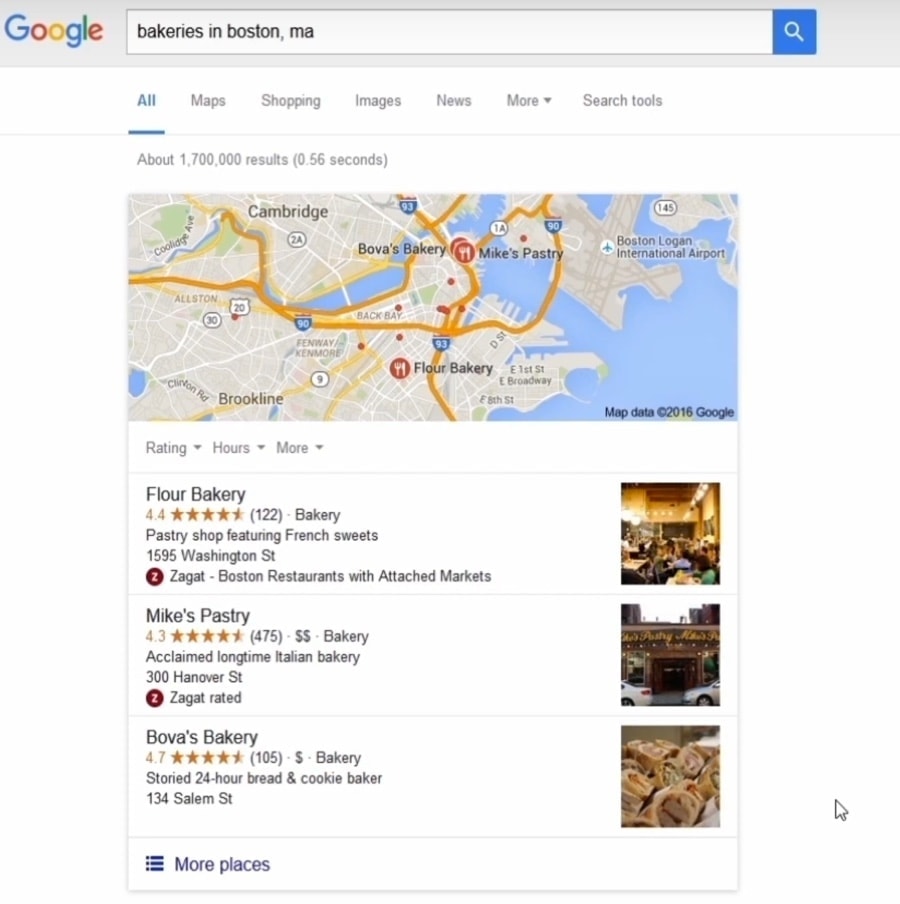
This depends on the type of business you have, but if you have a business with a physical address, this will help you get recognized in search engine results as a legitimate business.
Being a legitimate business in Google’s eyes means higher search engine rankings, especially in Google’s local search. Your business has a better shot of being featured in Google Local Service’s “three-pack”, which highlights the top three businesses in a city.
Finishing up
That’s it. As you can tell, that was a lot of work and there’s still a lot of work ahead. Running your own business is challenging and rewarding; we hope this guide made your life a little easier, at least when it comes to building a business website.
If you have any questions left, please leave a comment below!
Updates:
19 Jan 2023 – Checked for accuracy
29 Dec 2020 – Tutorial video added
The authors
Learn more about us

THE BEHIND THE SCENES OF THIS BLOG
This article has been written and researched following a precise methodology.
Our methodology